From 2002 DotNetNuke built from scratch, until now there are indeed LOTS of DotNetNuke versions, which had made everyone headache with DNN modules/skins maintenance. :(
Luckily, there still are more or less benefits to play with DNN because it exposed a few flexible APIs to make our life better, such as IPortable interface makes data migration easily and quickly between different dnn environments. Today I would like to show how to migrate blog data of SunBlogNuke, for example, from older version to latest fresh installation.
Export Blog Content
To get started the migration process, firstly we need to export old blog data from the source dnn website. Just follow up the steps below:
1) Go to blog page SunBlogNuke installed there. Find out the Meta widget - the sub module with "Admin Panel" link to enter Dashboard.
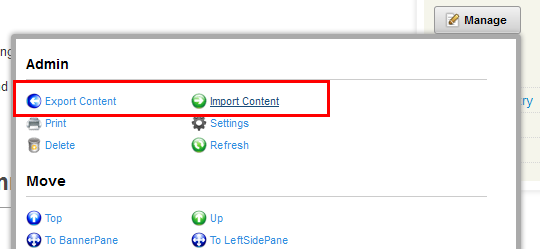
2) Mouse over module actions menu, in common it should be in the left-top. Expand it and click the link "Export Content". Like that:
3) Enter export panel. Choose folder to place the export data file(we recommend that you choose the folder called 'Templates') and fill in the file name, such as YOUR-BLOG-TITLE.
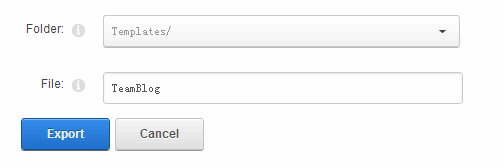
4) Click button "Export" to make this action complete. If not any error happened, your blog data(may like that $ROOT/Portals/XX/Templates/content.SunBlog.YOUR-BLOG-TITLE.xml) have been exported into here.
5) Enter Admin/File Manager page and navigate to the source folder, here is the folder called "Templates", where you should find out the exported xml file "content.SunBlog.YOUR-BLOG-TITLE.xml".
6) Click to download it in your local computer.
That is all and the data source is ready now.
Import Blog Content
Actually the import process is similar with the export one but in opposite way and completed in the target dnn website. Simply as follows:
1) Enter Admin/File Manager page and navigate to the target folder, here is we choose the folder called "Templates".
2) Upload the source file – our exported xml file in local computer – into this folder.
3) Return your page with new fresh SunBlogNuke installed. Also find out the Meta widget - the sub module with "Admin Panel" link to enter Dashboard.
4) Also mouse over module actions menu, in common it should be in the left-top. Expand it and click the link "import Content".
5) Enter import panel. Choose folder "Templates", and select the source file like "content.SunBlog.YOUR-BLOG-TITLE.xml".
6) Click button "Export" to make this action complete.
If not any error happened, congratulations, your blog data should be migrated into your new dnn website. Just return to check it out whether it works like a charm.
Workaround for Blog Authors Issues
With built-in dnn import process, there is one known issue with blog authors. If the foreign key – userid of every post not exist in new website, it will apply current admin/host account as blog author. To fix it, please open up the imported file with any xml editor and modify the userid or createdby element with your new userid, which you find it easily in the profile page. For example,
Original: <userID>3</userID>
Modify: <userID>113</userID>
Actually you complete in one second with find & replace action. Then it will apply this new userid as blog author of your imported posts.
The last thing of migration process is to check out the permalinks of all the posts whether have been redirected to new website. If not, update your blog settings and regenerate all the links in the basic settings. And re-assign blog authors may be required, too.
If you have any questions please feel free to raise your question in our forum or contact us.